Style Designer
The Graphviz DOT language includes many attributes that control the appearance of nodes and edges. The style designer worksheet helps you compose style specifications without needing to know every detail of the DOT language.
Quick Links
Overview
The Style Designer worksheet provides an adaptive interface for composing Graphviz style specifications.
The worksheet appears as follows:
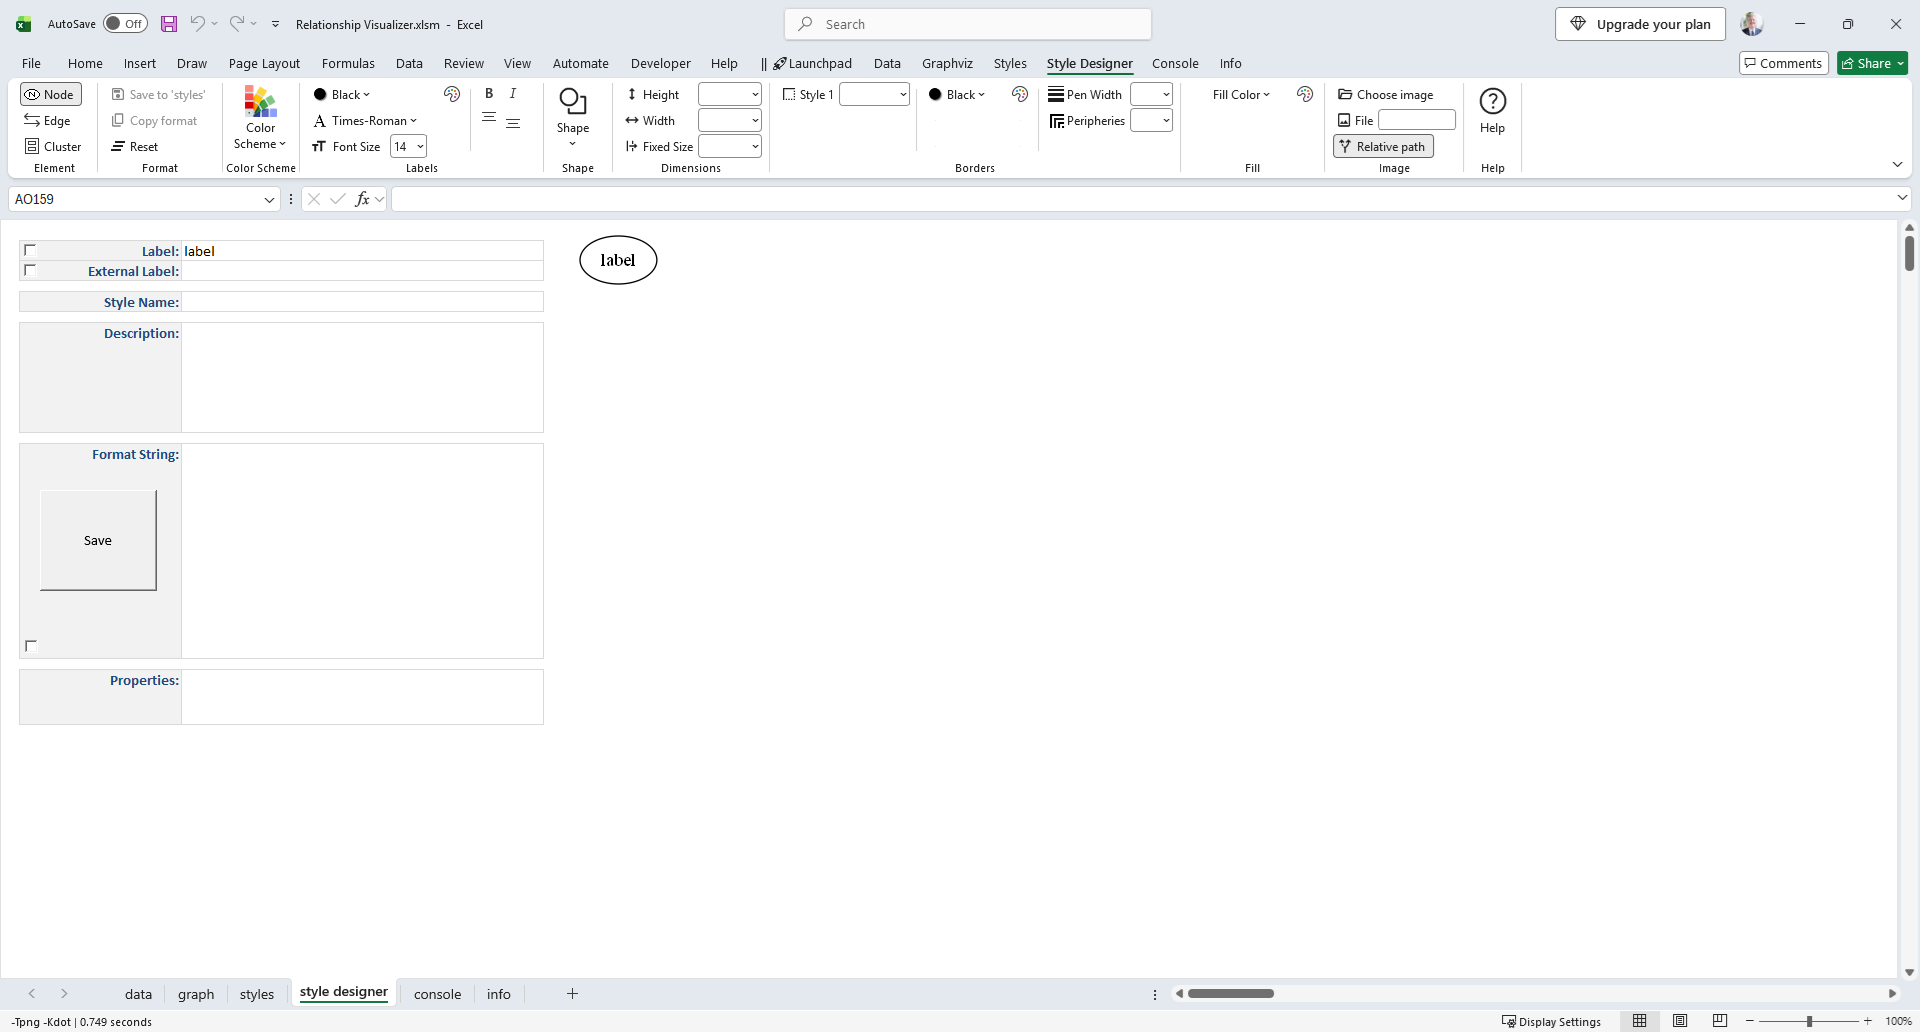
It consists of the following constructs:
- Ribbon Controls - clickable choices for Graphviz’s visible attributes.
- Label Fields - preview areas where you can enter and view text.
- Style Name - the name assigned to the style definition on the
stylesworksheet - Preview Image - generated by Graphviz to show exactly how your combination of attributes will be rendered.
- Format String - the underlying style specification containing the Graphviz attributes.
- Save Button - saves the style definition to the Styles worksheet, where it can be applied to rows in the Data worksheet.
Ribbon Controls
The Style Designer ribbon tab provides three dynamic design modes, controlled by the Element radio buttons in the left‑most group. These modes let you create node styles, edge styles, and cluster styles. The ribbon controls update automatically as you make selections.
Node design mode
Displays the Graphviz node-related attributes.
Windows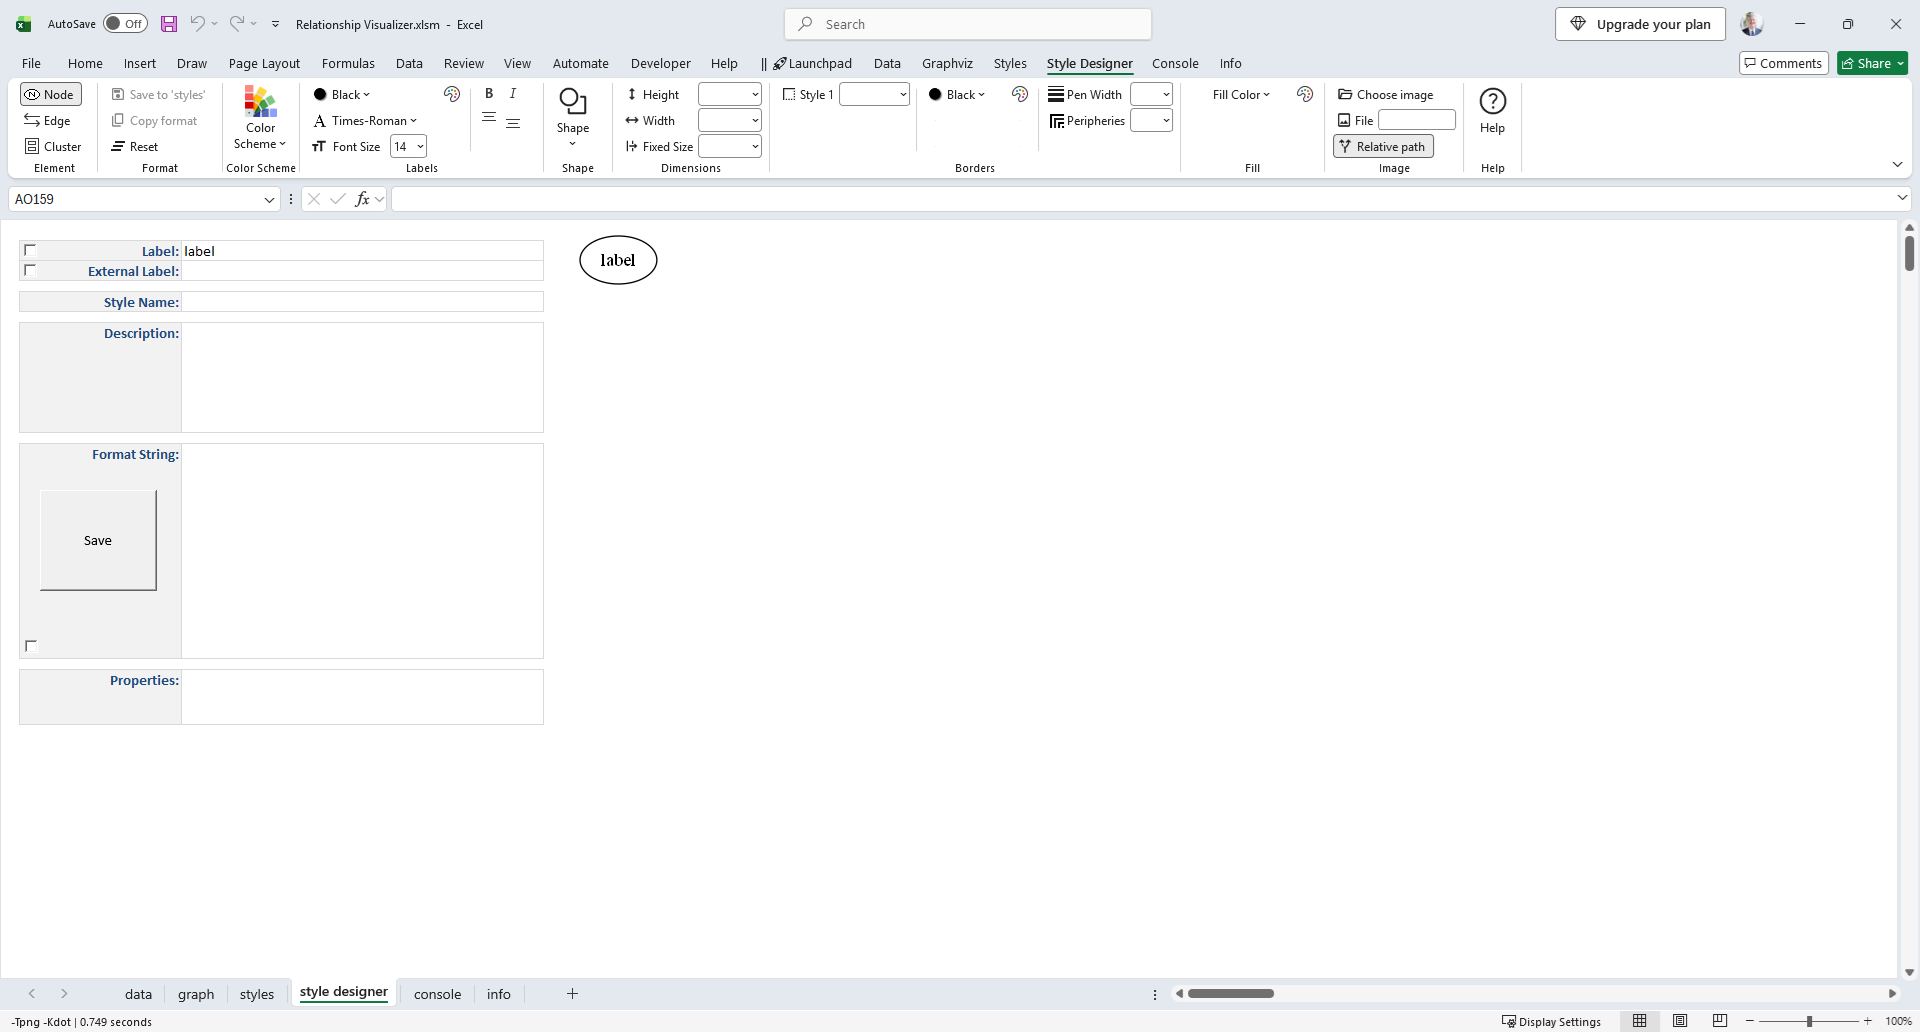
macOS
Edge design mode
Displays the Graphviz edge-related attributes.
Windows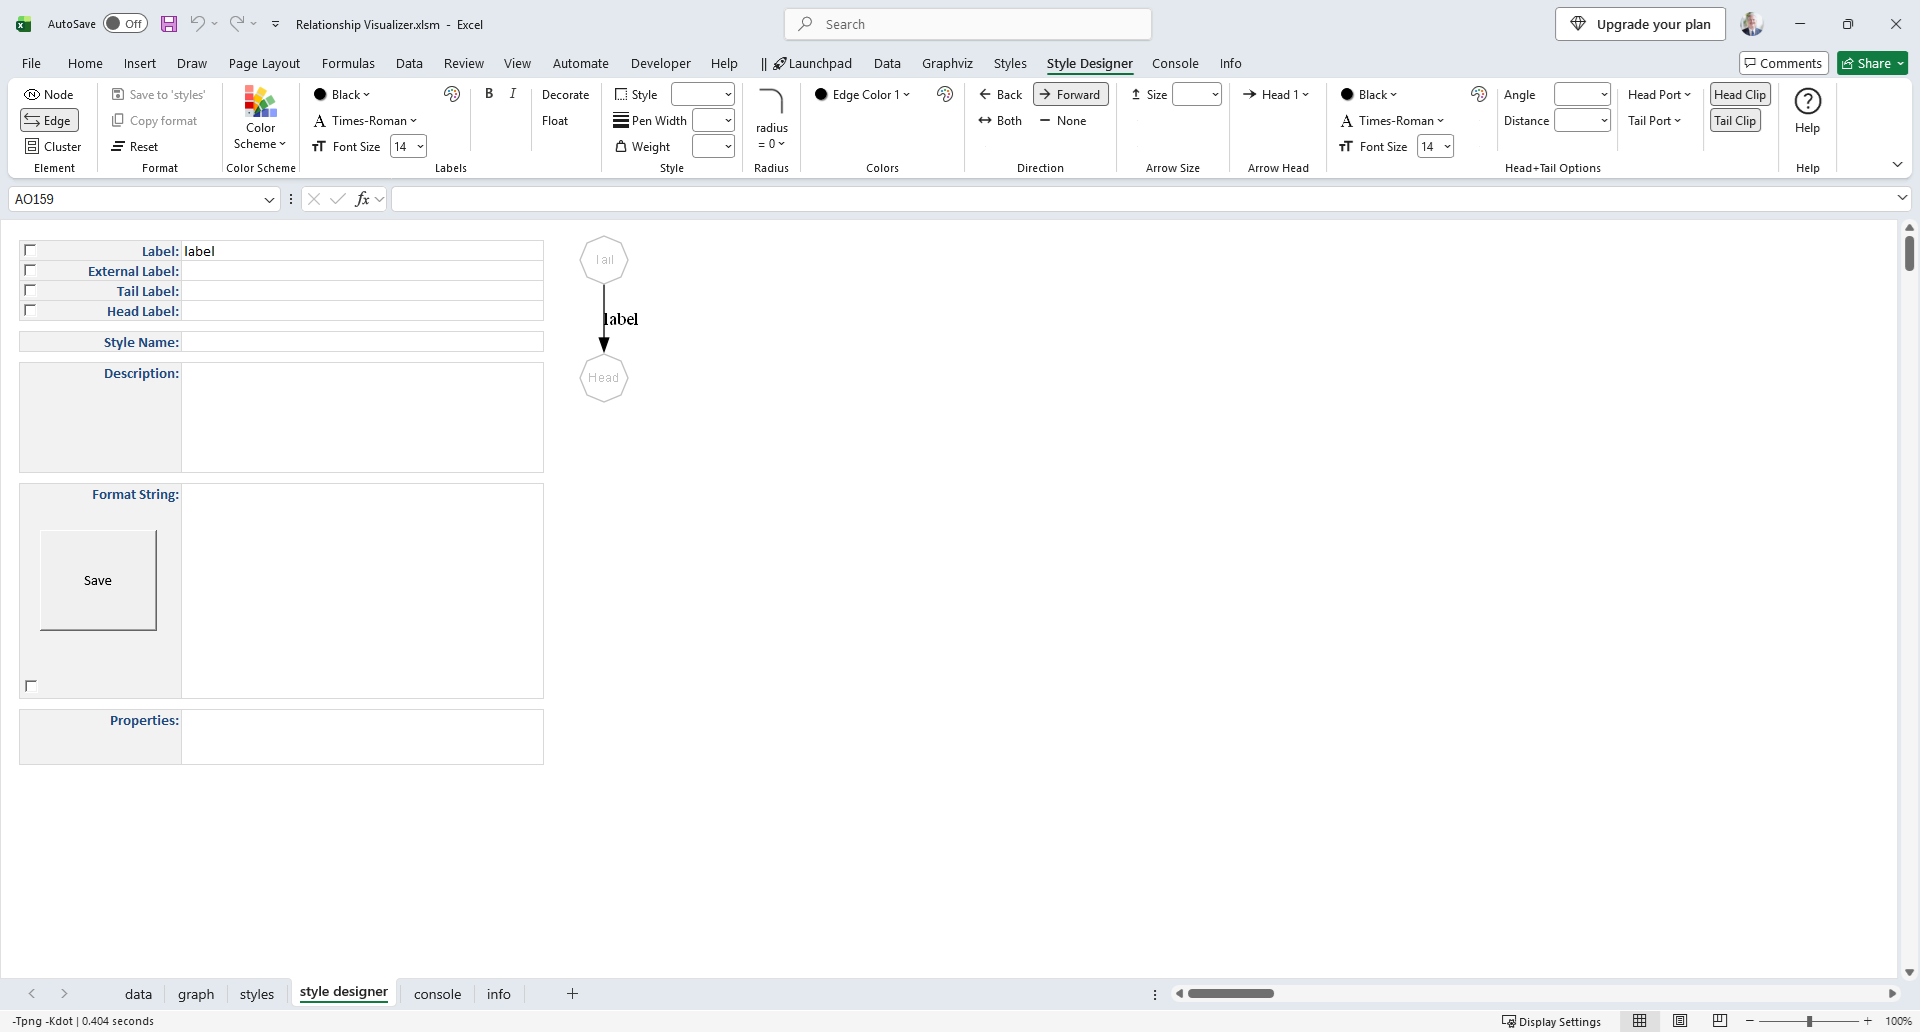
macOS
Cluster design mode
Displays the Graphviz cluster-related attributes.
Windows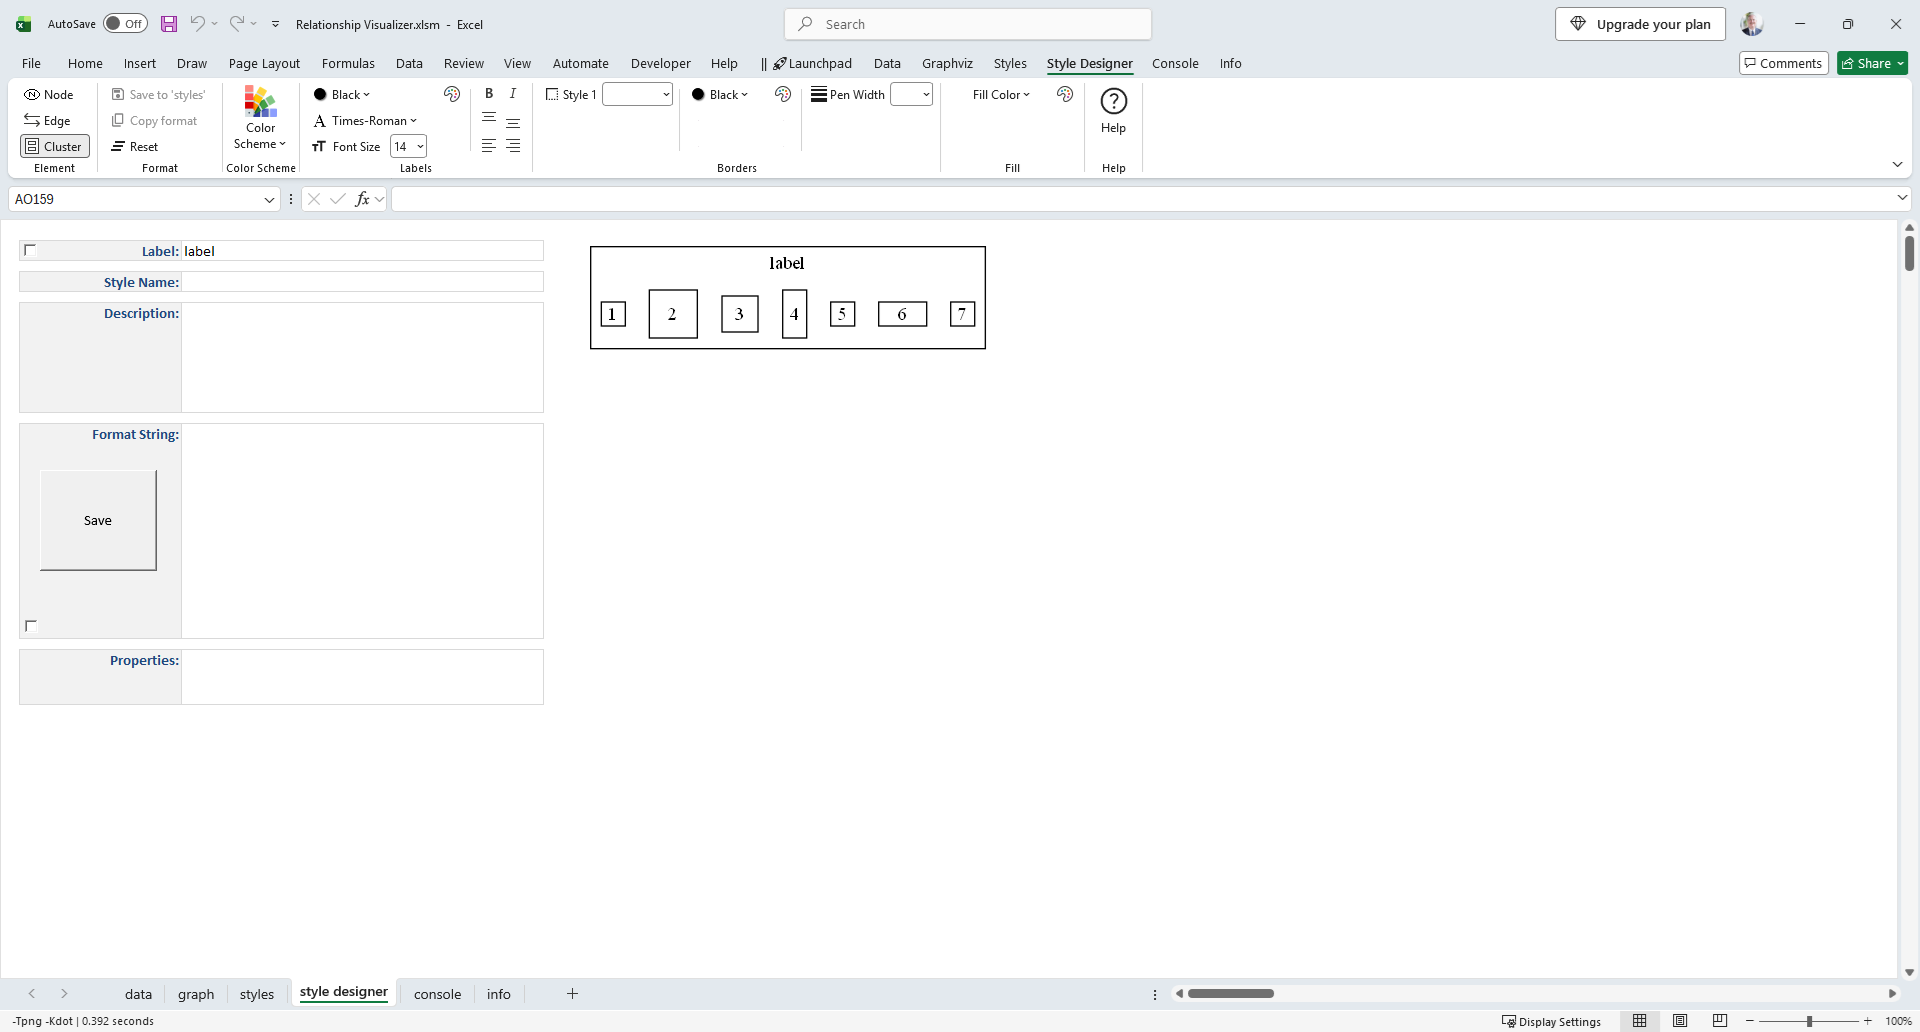
macOS
You define styles by making selections on the Style Designer ribbon tab. As you choose options, a format string is generated, and a sample rendering of the node, edge, or cluster is produced using the graphing engine and spline values from the Graphviz ribbon tab (explained later).
Use these elements as guides when making selections on the Style Designer worksheet, ensuring that appropriate Graphviz attributes are applied in context. For example, when Element = Edge, attributes such as shape are not offered because they are not valid for edges.
In each design mode, you can experiment with different values until you achieve a visually pleasing result.
Label Fields
The Label Fields let you define text that appears in the preview image on nodes, edges, or clusters.

The fields shown depend on the current design mode and what Graphviz supports in that context:
| Design Mode | Label | External Label | Tail Label | Head Label |
|---|---|---|---|---|
| Node | ✅ | ✅ | ||
| Edge | ✅ | ✅ | ✅ | ✅ |
| Cluster | ✅ |
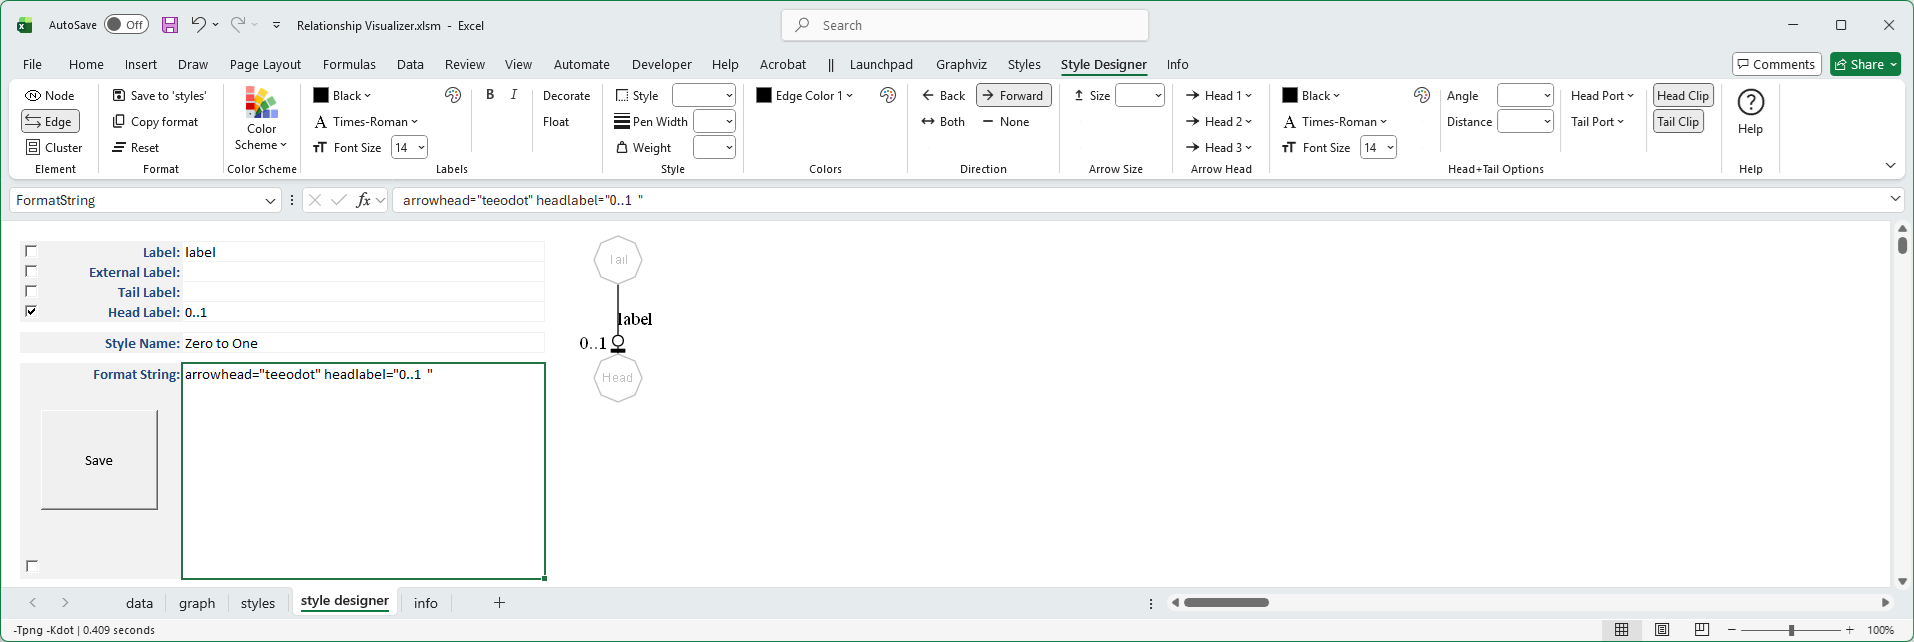
Each label field has an associated check box:
- Checked → The label is included in the style definition and will appear whenever the style is applied.
- Unchecked → The label is shown only as representational text in the preview image, not part of the saved style.
Example
Suppose you are defining an edge style to represent a zero‑to‑one relationship. By entering the caption “0:1” in the Head Label field and checking its box, the label will be included in the style definition. Whenever this "Zero to One" edge style is used, the “0:1” caption will automatically appear next to the arrowhead.
Style Name

This cell contains either:
- The name you want to assign to a new style definition.
- The existing name of the style definition on the
stylesworksheet which is being modified.
Description
Specifies a text description that explains the purpose of the style. The description is carried forward as data in the Knowledge Graph output.

Format String
As you make selections the Format String cell builds a list of Graphviz style attributes and writes them to the large cell below:

The Format String cell is also an active cell, meaning you can edit it directly to fine‑tune settings beyond the options provided in the drop‑down lists.
For example:
- The font size list jumps from 36 to 48.
- If you want a font size of 40, you may type the value directly into the cell.
⚠️ Important Notes
- Any change made in the Ribbon will overwrite hand‑made edits in the Format String, since ribbon changes rebuild the specification.
- Conversely, deleting all the contents of the Format String cell will reset the Ribbon settings back to their default values.
Properties
Used to optionally specify name/value pairs that extend the meaning of a style. For example, an edge style connecting two applications over HTTP might include properties such as protocol="http", encryption=false, or approval="disallowed". All properties are carried forward as data in the Knowledge Graph output.

Save Button
The large Save button, along with the Save to 'styles' button in the Ribbon, saves the contents of the Format String using the specified Style Name on the Styles worksheet.
- Each saved style definition is stored as a row in the Styles worksheet.
- These saved styles can then be applied to rows in the Data worksheet.
- This workflow allows you to build a library of reusable node, edge, or cluster styles.
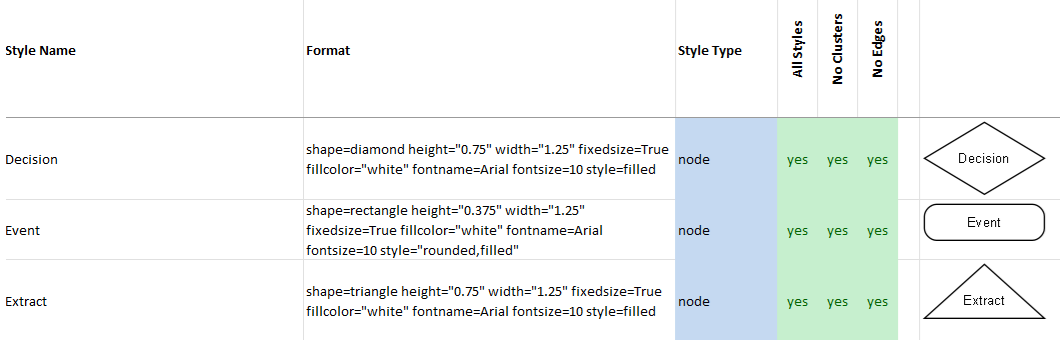
For example, the image below shows three Node style definitions created with the Style Designer and saved on the Styles worksheet: